
Deploy OpenClaw on BrainHost
This guide explains how to deploy OpenClaw on a BrainHost KVM VPS using the built-in Applications panel (one-click installation), and how to access the dashboard securely via an SSH tunnel.
It is intended for:
- Developers evaluating OpenClaw
- Solo builders running personal AI agents
- Teams wanting a clean, repeatable deployment flow
Architecture Overview
With this method:
- BrainHost provisions a KVM VPS (Ubuntu)
- OpenClaw is installed automatically using the official installation script, which sets up all required dependencies and runtime components on your VPS.
- You access the control dashboard locally via SSH tunnel (no public UI exposure)
- AI provider credentials can be configured during or after deployment
This keeps your instance: private, reproducible, and easy to manage.
Prerequisites
Before you begin, ensure you have:
- A BrainHost account
- At least 2GB RAM VPS (minimum requirement shown in the UI)
- SSH access to your VPS
- (Optional) An API key from your preferred AI provider (e.g., Anthropic, OpenAI, etc.)
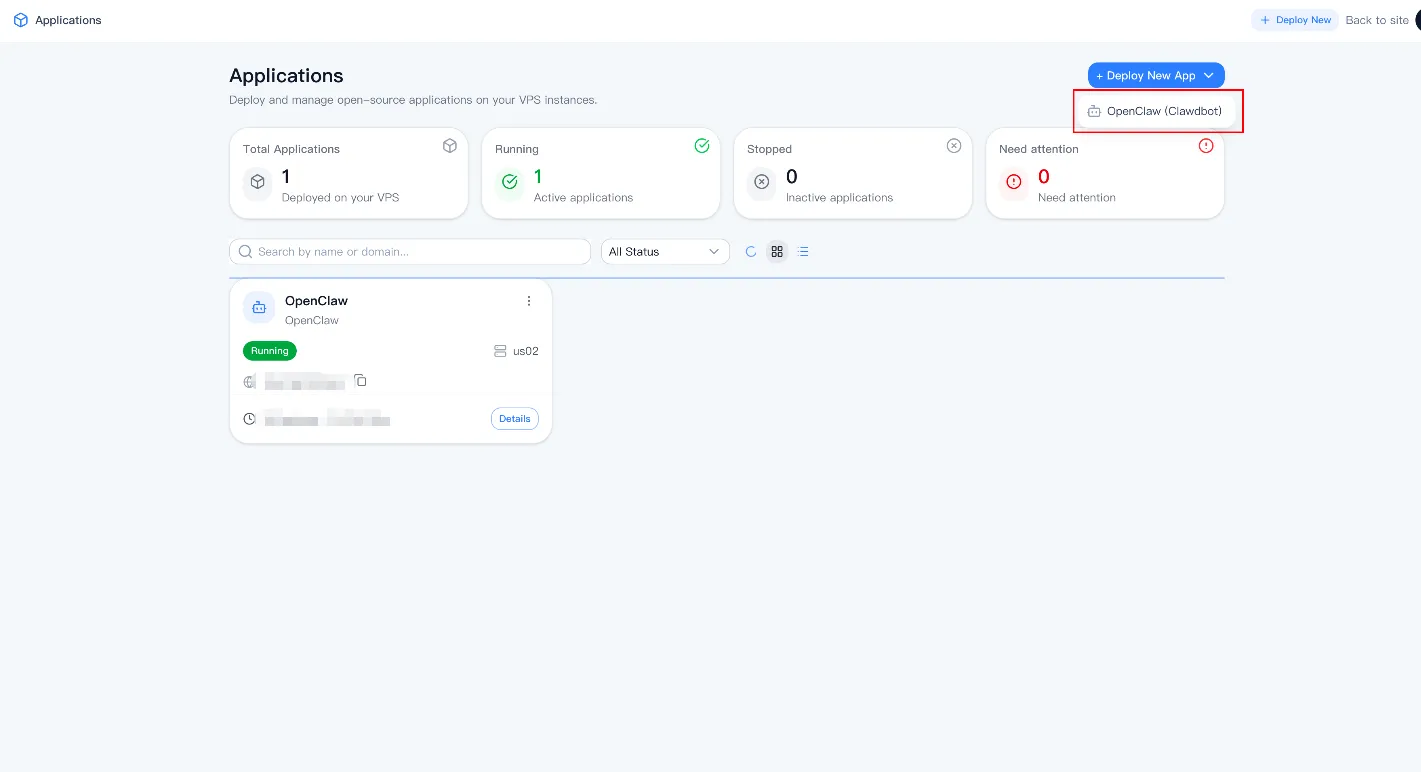
Step 1 — Open the Applications Panel
- Log in to BrainHost Dashboard
- Click your profile in the top-right corner
- Select Applications
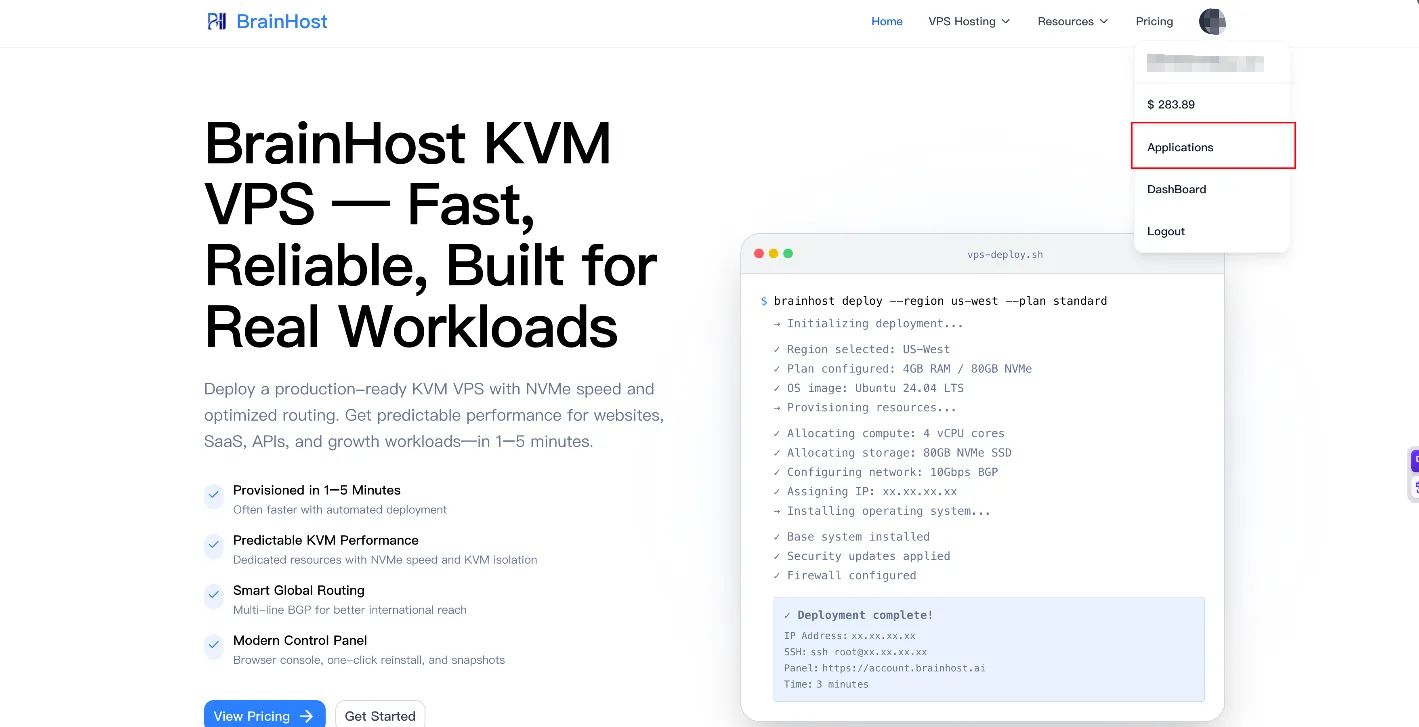
You should see: Total Applications, Running / Stopped status, and a list of existing app deployments.
Click Deploy New App → OpenClaw (Clawdbot).
Step 2 — Select Target VPS
You will be prompted to select a VPS instance.
- Choose your running VPS (must have ≥ 2GB RAM)
- Click Continue
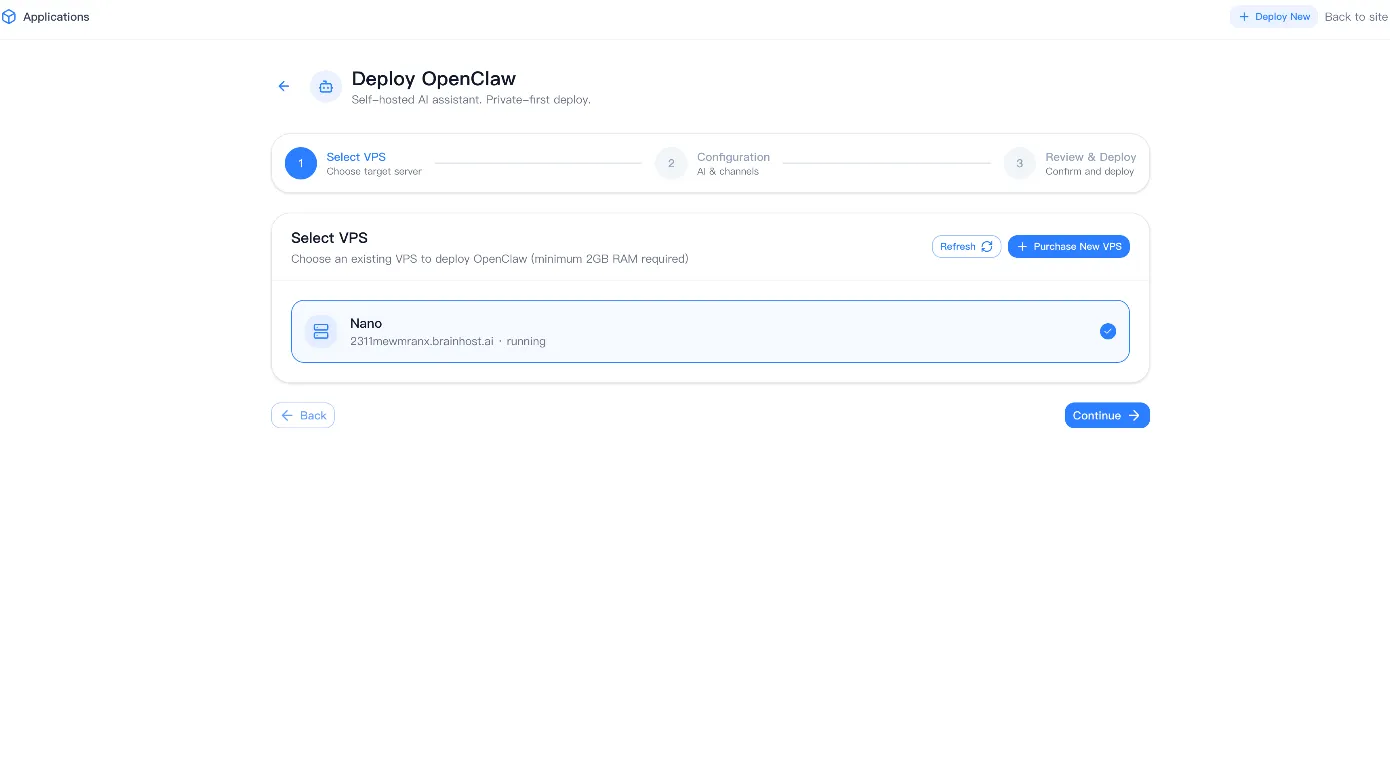
The system will validate the target machine automatically.
Step 3 — Configure AI Provider (Optional)
You can either:
- Configure now: Choose model (e.g.,
anthropic/claude-sonnet-4-5) and paste your API key - Skip for Now: Configure later inside the OpenClaw dashboard
You can always update this after deployment.
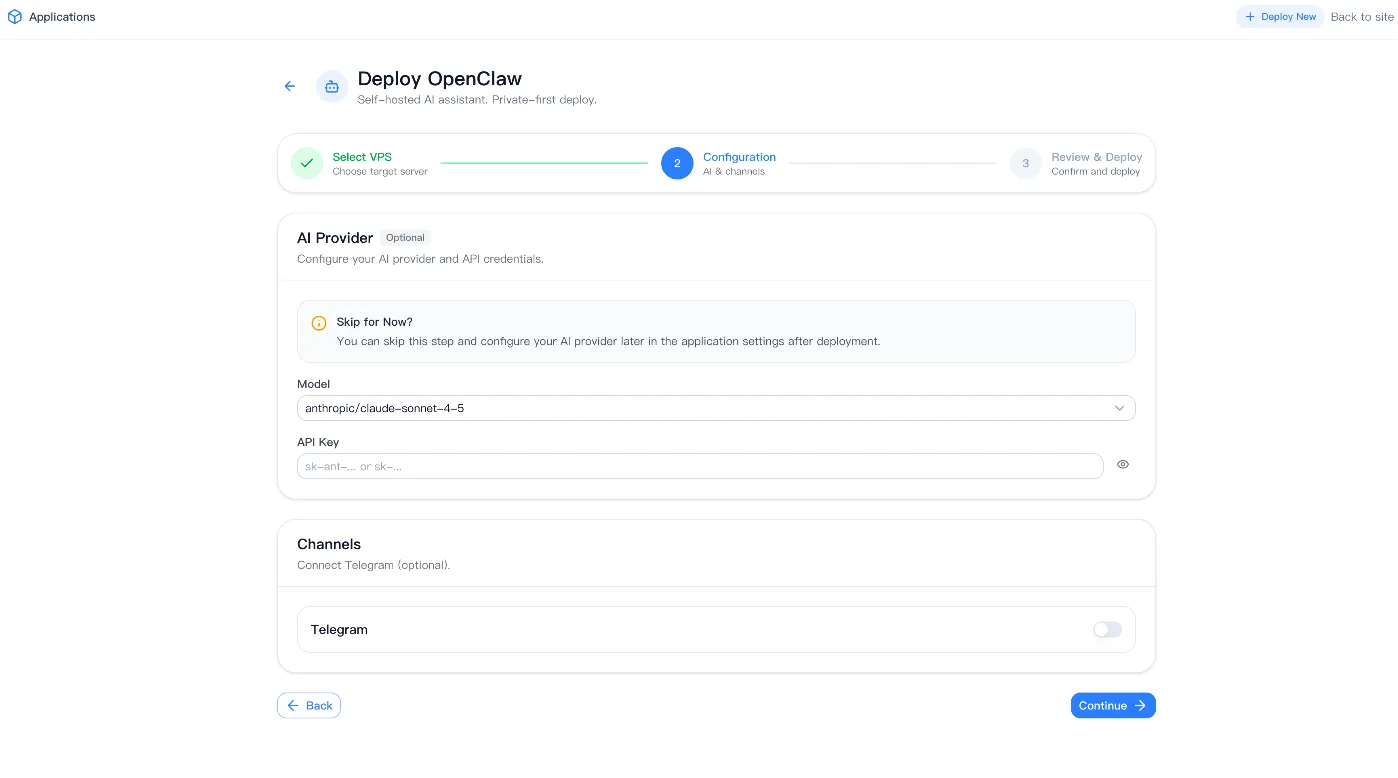
Step 4 — (Optional) Enable Telegram Channel
If you want OpenClaw to integrate with Telegram:
- Toggle Telegram → ON
- You can connect your bot after installation
Otherwise, leave it off and continue.
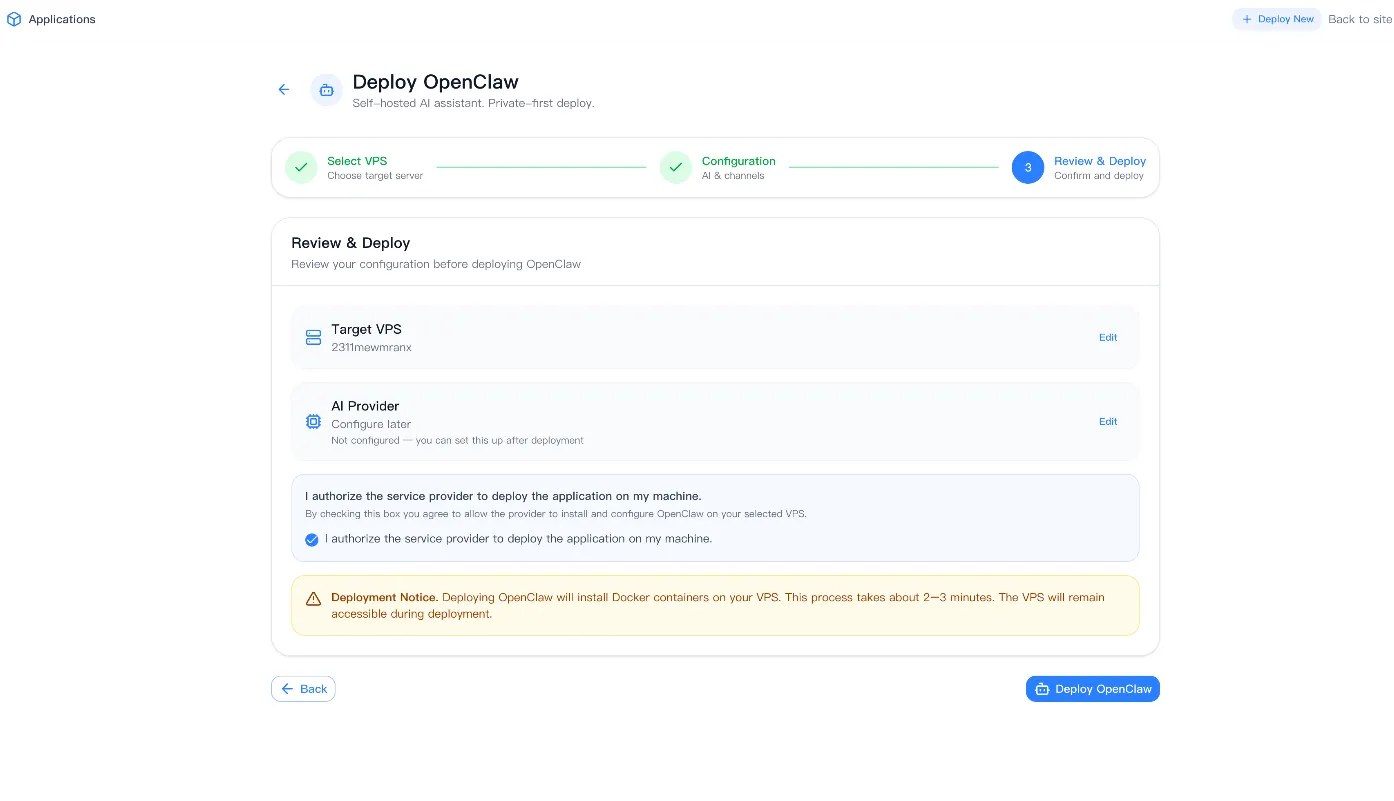
Step 5 — Review & Authorize Deployment
On the Review page:
- Confirm your target VPS
- Confirm AI provider (or “configure later”)
- Check the box: “I authorize the service provider to deploy the application on my machine.”
Note (BrainHost): Deploying OpenClaw will install Docker containers on your VPS. This process takes ~2–3 minutes and your VPS remains accessible.
Click Deploy OpenClaw.
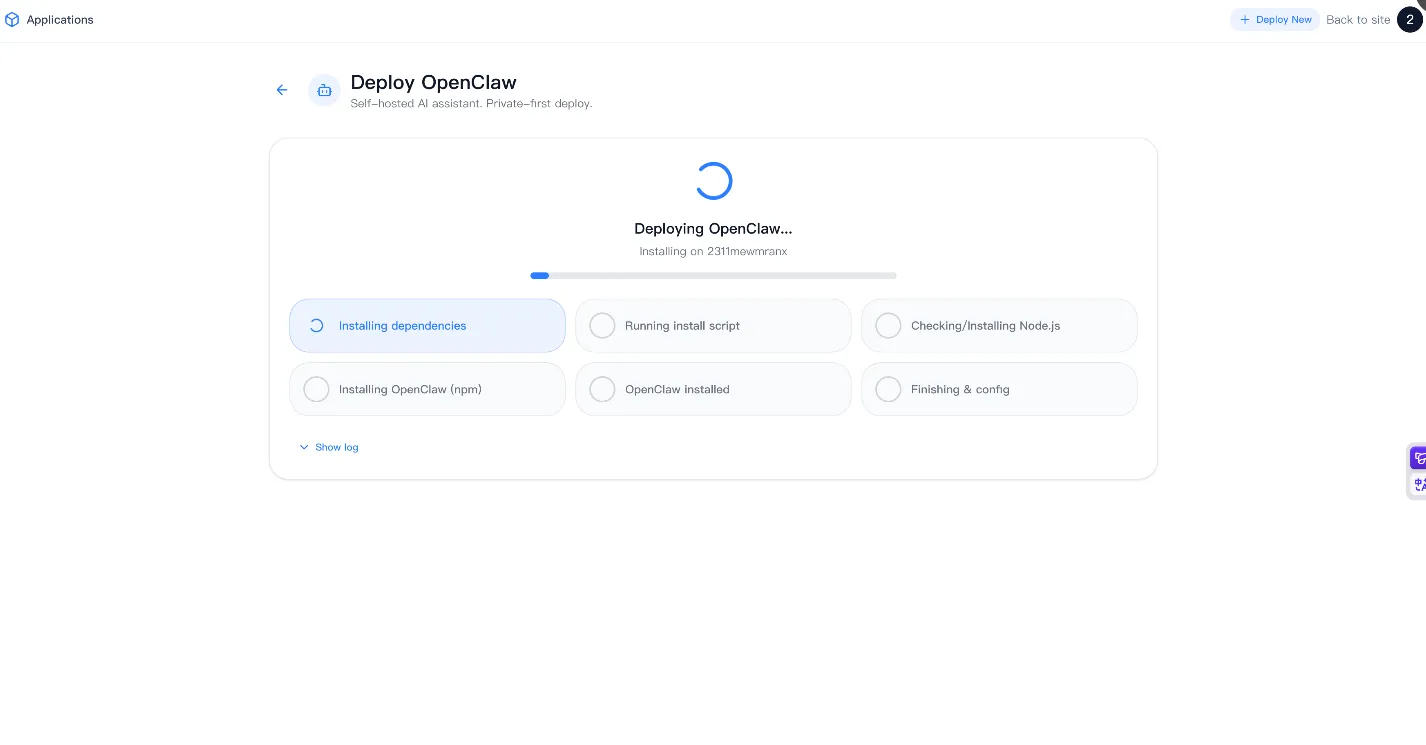
Step 6 — Wait for Installation
You will see a progress screen including: Installing dependencies, running install script, checking/installing Node.js, installing OpenClaw, finishing configuration.
This usually completes within 2–3 minutes.
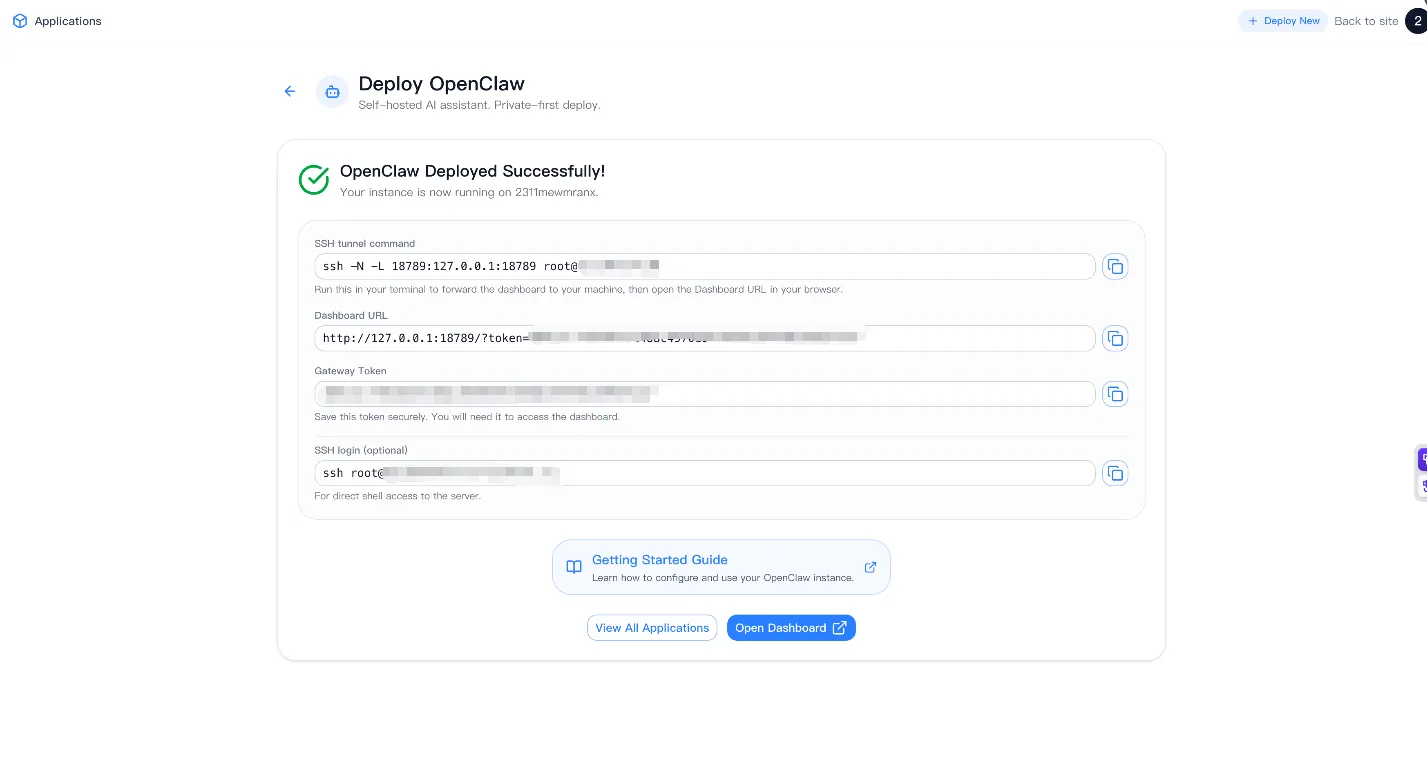
Step 7 — Deployment Success Page
Once finished, you will see:
- ✅ “OpenClaw Deployed Successfully!”
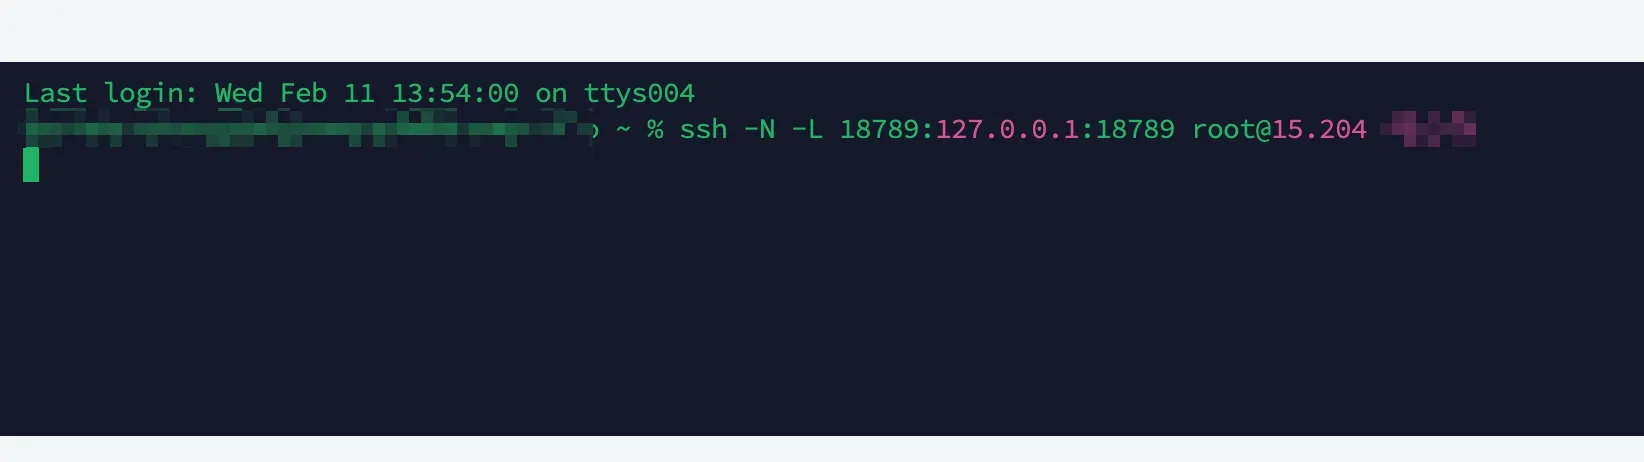
- An SSH tunnel command, for example:
ssh -N -L 18789:127.0.0.1:18789 root@<your-vps-ip>
- A Dashboard URL similar to:
http://127.0.0.1:18789/?token=<your-token> - A Gateway Token (store this securely)
- An optional SSH login shortcut:
ssh root@<your-hostname>.brainhost.ai
Step 8 — Access the OpenClaw Dashboard
- Open your terminal locally
- Run the SSH tunnel command provided by BrainHost
- Open the Dashboard URL in your browser:
http://127.0.0.1:18789/
You should now see the OpenClaw Control UI.
Step 9 — First-Time Configuration
Inside the dashboard you can:
- Add / update your AI provider
- Configure channels (Telegram, Slack, etc.)
- Create agents
- Install skills / plugins
- Monitor gateway status

Security Best Practices
We recommend:
- Do NOT expose port 18789 publicly. Always access via SSH tunnel.
- Use a non-root user for daily operations if you plan to SSH regularly.
- Keep your Gateway Token secret.
- Periodically update your VPS system packages.
Troubleshooting
Cannot access dashboard?
- Ensure your SSH tunnel is running
- Verify you are opening
http://127.0.0.1:18789/on your local machine
Installation stuck?
- Refresh the Applications panel
- Check VPS logs via SSH
- Redeploy if necessary
Need to change AI model?
- You can configure this anytime inside the OpenClaw dashboard.
Conclusion
Using BrainHost’s Applications panel, you can deploy OpenClaw in minutes without manual Docker setup. This method is ideal for quick prototypes, personal AI agents, small team experiments, and learning OpenClaw with minimal friction.
Need help?